Place side-by-side or overlapping images in GIMP with automatic Container adjustment
What is GIMP?
GIMP is an excellent cross-platform image editor: Windows, macOS and any GNU/Linux distribution.
It is a full-featured software, strictly open-source and free.
Perfect for trying to create a “collage” of overlapping or side-by-side images, even with different sizes, and export the result as a single image in .jpg or .png format.
Side-by-side and overlapping images
I have repeatedly needed to “blend” several images side by side or overlapping.
The advice that is usually given on the net for such an operation in GIMP involves adding by hand the space in the “Canvas” necessary for inserting the images following the first one.
For example: after opening a 100x100 px image in GIMP, to place another one of the same size next to it, it is usually advised to create an additional space in the canvas of another 100 px next to the first one, to open the additional image with the command “Open as layers…” (short command: ctrl-alt-o) and to drag the new image into the dedicated space with the mouse.
Effectively it works but, of course, it is necessary to manually calculate the size of the space to be added in the canvas (or container).
I wondered, therefore, if GIMP could provide a system to automatically change the size of the container when adding new images.
The answer is positive, and in this article I explain how it works.
It is important to keep in mind that images after the first should always be opened as “layers” (short command: ctrl-alt-o) so that they can be modified independently of the other images opened as layers, for example by scaling them or making them transparent.
After adding the second, third, … nth image, there are basically two possible scenarios:
- The Canvas (Container) appears to be larger than the overall image.
- The overall image appears to be larger than the Canvas (Container).
Below: how to solve both scenarios.
Canvas (Container) larger than the overall image
In the following image, you will find an example of a Canvas larger than the image, in this case consisting of the Emacs logo:
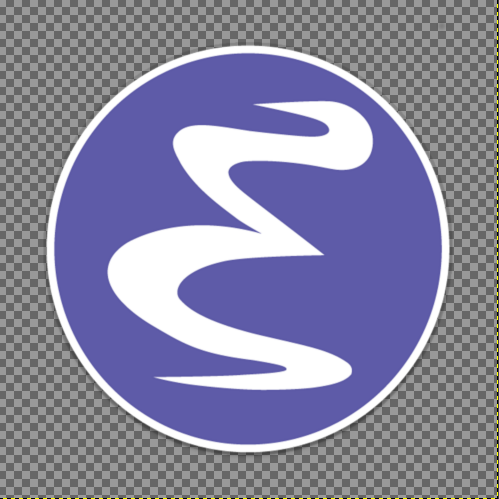
Then you need to reduce the canvas to the image.
For this operation, you use the Image menu item and the sub-item Crop to Content.
Overall image larger than the Canvas (Container)
In the following image, you will find an example of an overflowing Vim logo, thus larger than the canvas in GIMP:
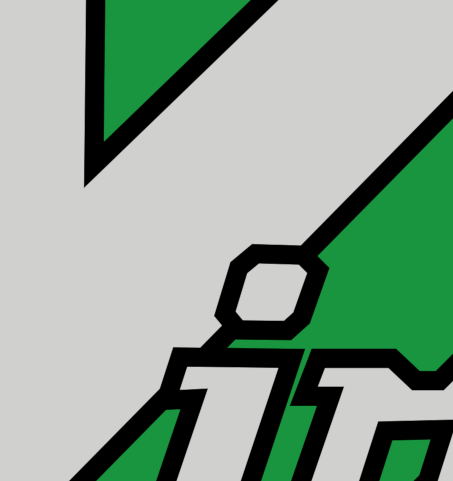
This is, of course, the opposite case from the previous one.
In this case, you need to use the Image menu item and the sub-item Fit Canvas to Layers and, if necessary, followed immediately with Crop to Content to remove the extra part of canvas added by the previous command.
In this case it may happen that the display of the image exceeds the computer monitor.
To reduce the display to the size of the monitor, you use the View item, the sub-item Zoom and the additional sub-item Fit Image in Window (quick combination: Shift-Ctrl-J).
Exporting the result
At the end of all additions, processing and changes, you save the result with File followed by Export as... (quick combination Shift-Ctrl-E) choosing the desired format (.png or .jpg).
Above the title of this article, you will find a “demo” of an image obtained with the following free pics:
- Emacs logo
- Vim logo
- Freeplane logo
- Mind Map in Freeplane.
- Firefox logo
Thank you for your attention